Showing posts with label Tim Holtz. Show all posts

Oct 29, 2023

Candy cane Bunny

Burrrrrrrr.... How the temperature has changed here! Definitely feels like November is around the corner!

Today's card is a holiday offering using KLM Digital Designs Candy Cane Bunny from the October release.

 Friend Bunny is colored with Copic markers and partially cut with a stitched oval die. The background layer is stamped in red with Tim Holtz's Ticking stamp. I used some leftover foliage die cuts from my Sizzix collection.

The sentiment comes with the image and says, "Sweetest wishes for a wonderful Christmas".  I split the sentiment and put the last part on the inside of the card. There are two other sentiments included with the image.
I think I'm in the mood for a little Peppermint tea 😉

Copic Map:
Bunny: E40,42,43,44, N1
             Ear - E000, E00, R20
Hat: R29, 22, 39
Candy Cane: R22,29,39, T1

Enjoy the day and keep creating!
Susan


Oct 5, 2023

Christmas Dinosaur

Welcome to my little creative space.

Today's card is a "cousin" to the Pilgrim Dino card seen here 

This is the Christmas Dino from this month's featured images at klmdigitaldesigns.com.

I have again used a variety of materials to go with my image.
Stash papers in red and star-printed kraft provide backdrops for the Spellbinders arch.
 I printed the dino onto card stock 3 times, creating three 4 1/4 x 5 1/2 panels. I used one printed image to cut out the hat. The second panel I cut using the Spellbinders Essential Arch dies and then stenciled the arch with  Distress Inks and stencil THMM133 from Stampersanonymous.com for the background.
The third panel I embossed with the Reptile 3D folder from Tim Holtz. 
I sprayed the embossed dino panel with Distress inks and quickly dried it. Then, used inks and stencil brushes to add more depth and shading. Once I achieved the look desired he was fussy cut.
I colored the hat with copics and glued it in place on the dino.
The dino is popped up with foam tape. Mini rhinestones from Hero Arts were added to the Christmas lights to make them sparkle a bit more. A Sizzix Thinlits set provided the holly accents for the corners.
The sentiment inside completes the front, "Ra Ra Ra Rawr".

Hope you enjoyed this card,
Susan

Sep 29, 2023

Halloween Treat Bag Series #2

Hello again.

Here are a few more of the Halloween bags.

Edison and Ghost from Holtz/Sizzix "Frightful Things"


Back of Edison and Ghost. Image and sentiment MFT Stamps


Edison and Friend Spider


Back of Edison and Spider. Images from MFT Stamps


Tim Holtz BOO/EEK set and bats


Back of BOO, Pumpkins from MFT Stamps


For the adult bag, a fussy mixed media make using the top of Anna Griffin's Carte Noel die and lots of  Ranger products. Distress inks, Crackle paste, collage medium, and Mica in windows. Can you spot the occupant looking at you?


 Back of the adult bag. Distress Oxide sky, Edison clouds, Graveyard Colorized Thinlet die, Anna Griffin RIP stone.


I'm off to make the last 6 bags until someone asks me to make a few more..... I really need to get on to my other makes now.

Enjoy the making season,
Susan

Sep 25, 2023

Tim Holtz Planters

Welcome all.

A bit earlier this year I made an assortment of cards for a breast cancer benefit. 

Here are 4 of the Thinking of You selection.
I used predominantly Tim Holtz/ Sizzix dies. The sun flowers were stamped and fussy cut using an old stamp set, I think it was PTI.

The interesting part of these is in the choice of backing layers.
Look carefully at the two on the right. Those are stamp packaging. Can you tell which companies they are from?

My challenge for you today is to look at some of your packaging
differently. You might be able to use it in a creation instead of throwing it in the trash!
Have you figured it out yet?
Top R- Lavinia Stamps
Bottom R - Idea-ology Tim Holtz
Enjoy your week and keep creating.
Susan

Sep 23, 2023

Halloween Treat Bags series#1

Hello, it is fall, according to the temperature here today. Technically fall will arrive at 2AM.

Here are a couple of the bags I have been making with an assorted collection of stamped and die-cut pieces I have in my drawer of pieces and parts. This is one time I can agree with Tim Holtz and Jennifer McGuire that having a pile of pre-made elements makes a make easier.
The basic bag was made with the Anna Griffin Halloween bag die. Several of the papers used for the bag construction were from an old Martha Stewart Halloween 12x12 pad.

Both of these bags use the Tim Holtz/ Sizzix Edison die and a little of the new Glow paste in the features so they will glow in the dark.
 
Green Edison with cloud and moss. MFT frog stamp


Back of Green Edison using MFT stamps and Anna Griffin bat and pumpkin dies


Purple Edison and bat/ Purple matt foil witch hat


Back of Purple Edison with MFT stamp characters.


Stay tuned...... more to follow.


Here is the front of the bag with a Tim Holtz "Edison" die.
I used mica spray to make the features pop and then used a bit of glow paste so it really does glow in the dark!

Sep 22, 2023

Halloween Treat Bags

Boooo!

Getting into Halloween makes the last few days. I really see lots of uses for this Anna Griffin bag die.

It comes with dies to decorate for Halloween but I just took it to another level and threw EVERYTHING in my craft room at these bags. Everybody on the list will be getting one for Halloween and Christmas and Valentine's Day and..... Do you get my drift?

This was an easy make. I cut the bag out of a paper pack from Martha Stewart, colored up the KLM Digital Designs image from the new release, and popped it up onto the bag. This photo was taken before I added the Ranger Grit paste to it. I colored it with a little Forest Moss ink and it looks so cool.

I'll fill a little snack baggie with some goodies and give this to someone on my list. The backs are also finished with assorted cutouts, stamps, and anything else I can find in my stash.


This bag is for my grandson, the skinny eating machine! I used the candy corn and cookie skull Sizzix dies as well as Mr. Bones to decorate this bag.

The sentiment is from a MFT Stamps stamp set. 

Like I said... I'm using everything I can lay my hands on.
I'll take a few more photos of the others and post them later. 
Right now I have 11 finished and 8 more to go.

Craft room here I come!

Susan

Sep 19, 2023

Sunshine birthdays

Hello there!
Today's card reflects the summer's end in the garden. I love all the sunflowers still standing tall in the gardens and fields around Vermont. The next few days are forecast to be crisp and cool which will speed up the foliage change which has already begun.

This card construction was new to me. It was so easy I actually made 3 of them, each a little different variation for three September birthdays.
You can see the tutorial HERE.

I wanted a bit more height and dimension in my card to support the taller sunflower, so I added a third piece behind the fold-out section.

I created some boards using a woodgrain embossing folder and some Distress Inks. Then I cut them and glued them in place so the fold-out section looked like an apple crate.
I used a lot of foam tape on the sunflowers and some thick acetate packaging to give the stems some strength. The sentiment is an Anna Griffin sticker and the grass is from some Lavinia stamps packaging. The sunflower stamps are from Papertrey Ink and Cardio designs. The cat is a Tim Holtz/ Sizzix Thinlit. It's fun mixing all the materials and styles of the products in my room. I've been doing that a lot of late.

Enjoy the beautiful fall days ahead and look for inspiration in the beauty of nature.
Susan

Sep 18, 2023

Welcome.

We had big birthdays this summer plus graduation. Grandson turned 18. Where does the time go?
I used several different stamps from Tim Holtz for this card. I forgot to add the weight to the gents collar before I took the video. He spins much better and rights himself now.
Enjoy all the new fall product offerings. Some are too good to resist despite a retiree budget 😏.
Until next time,
think positive and keep creating!
Susan

Sep 4, 2023

New Graduate's Car

Hello there! Welcome.

While on break from the design team I tried a few new things. One being this car die from Anna Griffin. As I mentioned before, her stuff is lovely, but not really my style, until this car........
I LOVE IT! I can see so many possibilities for this. 

I used some black foil paper from Tim Holtz with a little alcohol ink on it. The dapper fella is an Idea-ology Paper doll. I cut the area near his hand and slipped in a small piece of rolled parchment paper to suggest a diploma. For my Grandson but no car but this 😏

Who would have ever thought Anna and Tim styles would come together like this. I must try it again sometime.
Until next time,
 Smile and keep creating.
Susan

Sep 1, 2023

They're Baaaack! Graveyard Witch Gnome

Welcome! 
Finally some beautiful weather here in Vermont. Just in time for the return of the KLM Team.

I had so much fun working on this card!
I will admit it was a little labor intensive but I've been wanting to use some of my new Tim Holtz materials so I took this opportunity to marry the two styles together with some fun results!

I used Spellbinders Essential Arches Die set to make the card base and the inner sentiment liner.
The moon and glow in the dark grit paste on the moon are from the latest Tim Holtz Halloween release.  Yes, it actually glows in the dark! So much fun. I used some crypt paste with a dab of mica stain in green for the moss on the grave stone.
The arch layer was dipped into purple and blue Distress dye inks and mica sprays.

I used stencils from the Holtz collection and a bit of purple Mica  Spray to add a bit of texture to the black paper. The Broom is from the Frightful Things Thinlits Die set by Sizzix.


The image and sentiment were printed with an Epson ET printer onto Pen and Gear white card stock.
Coloring was done with Copic markers. It was fussy cut and popped up onto 3M Foam tape.

Color map:
Stone - C1,2,3,5,7, YG63, Y00
Skin - E00, kE35, V15
Hair - Y00, V12, 15, 09
Pumpkin - Y35, YR15, YR09, E09
Hat/ Coat - C1,3,5,8, 100, Y00
Dress - YG03, 17, G99

More fun is on the way so stay tuned!
Until then keep creating,
Susan

Oct 6, 2022

Halloween Dome Wonka style

Here it is, the last of the domes... for now.😏

This dome took some time to put together. There were a lot of elements that required dry time.
This spooky candy shop is for the 7-year-old granddaughter. She not only loves candy but Willy Wonka, too!

I have to admit the list of materials is crazy long but the result was worth it.

This is side one of the globe vignette with the lights on.
It is actually the back side of a vignette box that was painted with Distress Paint and Crayons and was distressed with Distress Crackle Texture Paste.  The doorway was made with chipboard pieces covered with Distress woodgrain card stock. The skeleton was stamped and fussy cut from watercolor paper. 
Here is a better look with more light.

The bottle brush tree was colored with Halloween 2022 Distress Mica Sprays. The small jar came from Family Dollar and is filled with some clear baubles and google eyes that I had in my stash.

The warning sign and candy are Tim Holtz Idea-ology products.
The candy shop sign I lettered.

Now for side two.


This is the candy shop, inside. I added a chipboard shelf to the vignette box. The "doily" is made with the Sizzix Crochet die.
The book introduces the Wonka connection. I filled the bottom of the Jack-o-lantern with bubble wrap to take up space, then filled the top with candy corn and Halloween confections.

On the bottom shelf a cauldron full of bubbles, colored with alcohol ink and "sugared" with glitter, spills over. The ultimate Everlasting Gobstoppers! Tucked in the back is THE golden ticket! 

The hardest part of making these are where and how to place the lights. It takes a good amount of pre-planning and patience to get everything where you want it.

Below is a picture of the candy shelf side with the lights on.


 All materials are products from Tim Holtz unless otherwise stated.
Idea-ology- Vignette box, Tiny Lights, Halloween Ephemera Pack, Bottle Brush trees, Jack-O-Lantern, Candy Corn, and Halloween Confections, Cauldron, Bubbles

Distress Woodgrain card stock, Distress Paints Antique Linen, Weathered Wood, Frayed Burlap, Hickory Smoke, Distress Crayon Hickory Smoke,  Distress Texture Paste Crackle,  Halloween 2022 Mica Spray,  Collage Medium

Sizzix Thinlits: Crochet #664178
Stamp: Sampers Anonymous THMM145

Tiny Jar and dome from Family Dollar
Clear glitter: Recollection
Hubby's Drill 😏

Oct 5, 2022

A Witches Dome

Hello there. Welcome to Creative Juice, and thank you for stopping by.

These domes are addictive! If you saw my previous post you know my dome-making started with learning to make little books from Tami Bastiaans (@playswellwithpaper). As always, I got carried away and made so many I needed to use them!


This dome is for my 9-year-old granddaughter. She is a big fan of Hocus Pocus, thus the witch theme for her.  The witch has her book of spells nearby.

I made the witch using 4 layers of heavy black cardstock and one layer of watercolor paper. This makes her sturdy enough to stand, with her feet between 2 layers of chipboard strips to make a stand.

I left the bubbles uncolored as I was using the green mini lights.


On the back side of the witch, there is a stick from my yard that had some natural lichen. I added some moss and leaf die cuts to cover a little of the wire from the lights.

I painted a small pumpkin with Distress Paints Antique Linen, Bundled Sage and some Distress Crayons rubbed on to grunge it up a bit.

I used several colored mosses on the "floor" of the dome to create a forest floor effect.

To the left of the tree is a skull that I drilled out so the eyes would glow.


Materials:
Sizzix/Tim Holtz Thinlit Witchcraft #662386, and Fall Foliage
                             #660955
Idea-ology - Halloween 2022 Ephemera pack, Bubbles, Skulls, 
                    Cauldron, Pumpkin, Halloween Deco Sheets, Tiny
                    Lights
Moss from Michale's
Dome from Family Dollar
Husband's drill 😏

One more to go.
Hopefully done tomorrow.


Oct 2, 2022

Halloween Poe Dome

Welcome! Thanks for stopping by. 
Today is a bit of a departure for me. I have been stalking some of Tim Holtz's designers for a while now. the talent never ceases to amaze me!

I purchased some of the Ideaology Halloween products. I had 3 weeks to think about what I would make and who for as they took a long time arriving. After I made a few books using Cracked Leather Cardstock and a Tami Bastiaans tutorial the light bulb came on.

Here is the back story. My sister-in-law loves Halloween. Her son, Chris, is a talented filmmaker/director/writer.
Several of his works are in the horror genre, thus the inspiration for this dome. He loves old books, and during a recent visit home, we found ourselves at a library book sale interested in the same old books. I decided I would use the film theme to create a Halloween Dome deco piece for his mother using some of his titles on the books.

If you follow Tim Holtz, he encourages people to make things ahead of time to have them on hand for making. Now I understand. It took me 3 days, on and off, to make the pieces for this dome. 

The dome I used was a Family Dollar Store find. I drilled a hole in the base to fit the bulb of a battery tea light.
I used an Idea-ology baseboard window frame as the separation between the 2 sides of the dome. It didn't quite have the look I needed so I covered it with Woodgrain Cardstock, treated it with Distress crayons, and added some Crackle Texture Paste. I used a bit of mica in the windows then cut the web and ghost from vellum using Sizzix/ TH Thinlits 664209 Frightful Things. Hanging from the web is a metal spider from Idea-ology Halloween 2022. The sticker at the top is from the Curiosities Sticker book. A little Mummy cloth on the bottom adds a little more texture.

I made some drippy candles and attached one to a Distress Painted pumpkin. I used one of the gear dies from the Gearhead Sizzix Thinlits set to cut 4 pieces. I trimmed away the cogs around the outside so it resembled a film reel. The film strip took the longest. It's a 1/2-inch strip of cardstock punched with hand punches.
I added the titles of Christopher's works to the books.


This is the writer's side of the dome, complete with a framed portrait of Poe. I found the picture of him in an old dictionary and cut a frame of copper cardstock distressed with Distress Crayons and Texture paste. The film reel is leaning against another drippy candle, three more books, a piece of the filmstrip, and a handmade ticket to Studio 13 finish the base.
A Curiosities sticker and a 13 from the Halloween Ephemera package finish the top.


This is Poe lit up in the dome.


Below is Linda's side of the dome. The moon at the top is the back of the 13 from the Poe side. I added a touch of Antique Linen Distress ink and stenciled a few craters using the moon stencils.
the bat is from the Halloween Ephemera pack. Linda is a HUGE animal lover, so I had to add the black cat to her side. The cat is sporting a tiny 13 to tie both sides together along with more books. There is a small piece of the film strip, but it's behind the books.


This was great fun to make. A lot more fun than rebuilding a deck, which was what I was doing while waiting for supplies to arrive and while I was creating the books, etc.  It was a much-needed diversion from construction disagreements. You would think I would have learned by age 71 that home improvements need to be done by a specialist! We're too old for this. 

At least it's nearly done and I can get back to creating!😌


Aug 31, 2022

Bailing on adulthood Gnome

Welcome, thanks for stopping by.
    There are days....and then there are others! Right? This fella is having one of those days. 
    I got the Snarky Small Talk sticker booklet from Tim Holtz/Ideaology and thought this worked with the leaping gnome from klmdigitaldesigns. I kid you not, my friend and I stood in the store, hysterically laughing at the sayings in the booklet. You just have to REALLY know the person you send them too. 
    The background uses a range of brown Distress Oxides that were brushed on card stock using a piece of paper as a mask to get a ray effect. It was then splattered with bolth gold and silver watercolors.
     The gnome is colored with Copics:
    Shirt- Y32, 23, 26
    Pants- YG93, 95, 97, 99
    Shoes/hat- E41, 42, 43, 44, 47

Hope you're having a better day than he is 😉😉.


Mar 29, 2021

Tim Holtz Tag inspired

Ah, yes. The Tim Holtz influence is undeniable. I just love his positive attitude and the way he encourages one to create. We need more people in this world with his kind of attitude. Anyway, most everything on this card is directly related to his work.


I used Distress Oxides in Kitsch Flamingo, Worn Lipstick and Spun Sugar on a gel press and Layered a Stampers Anonymous stencil THMM103 here and there.
The tag was cut with MFT Stitched Traditional Tag STAX and the background with Stitched Rectangle STAX.
All the colors on the tag is the pick up from my glass mat when making another project with Distress Oxide Ink.
The Wildflower 2 Sizzix Thinlit was cut from pieces of 
pre-made background papers. That little sentiment is from a sticker tablet, also Tim Holtz.


Mar 16, 2021

I'm a Holtz Junkie


I started to watch Tim's new video on the basics of the Distress Inks this afternoon. I'll most likely watch it again because I barely got into the first 5 minutes of the blending section and a lightbulb went off. I love playing with the inks to make interesting background papers. I have a drawer full, but never enough!😏
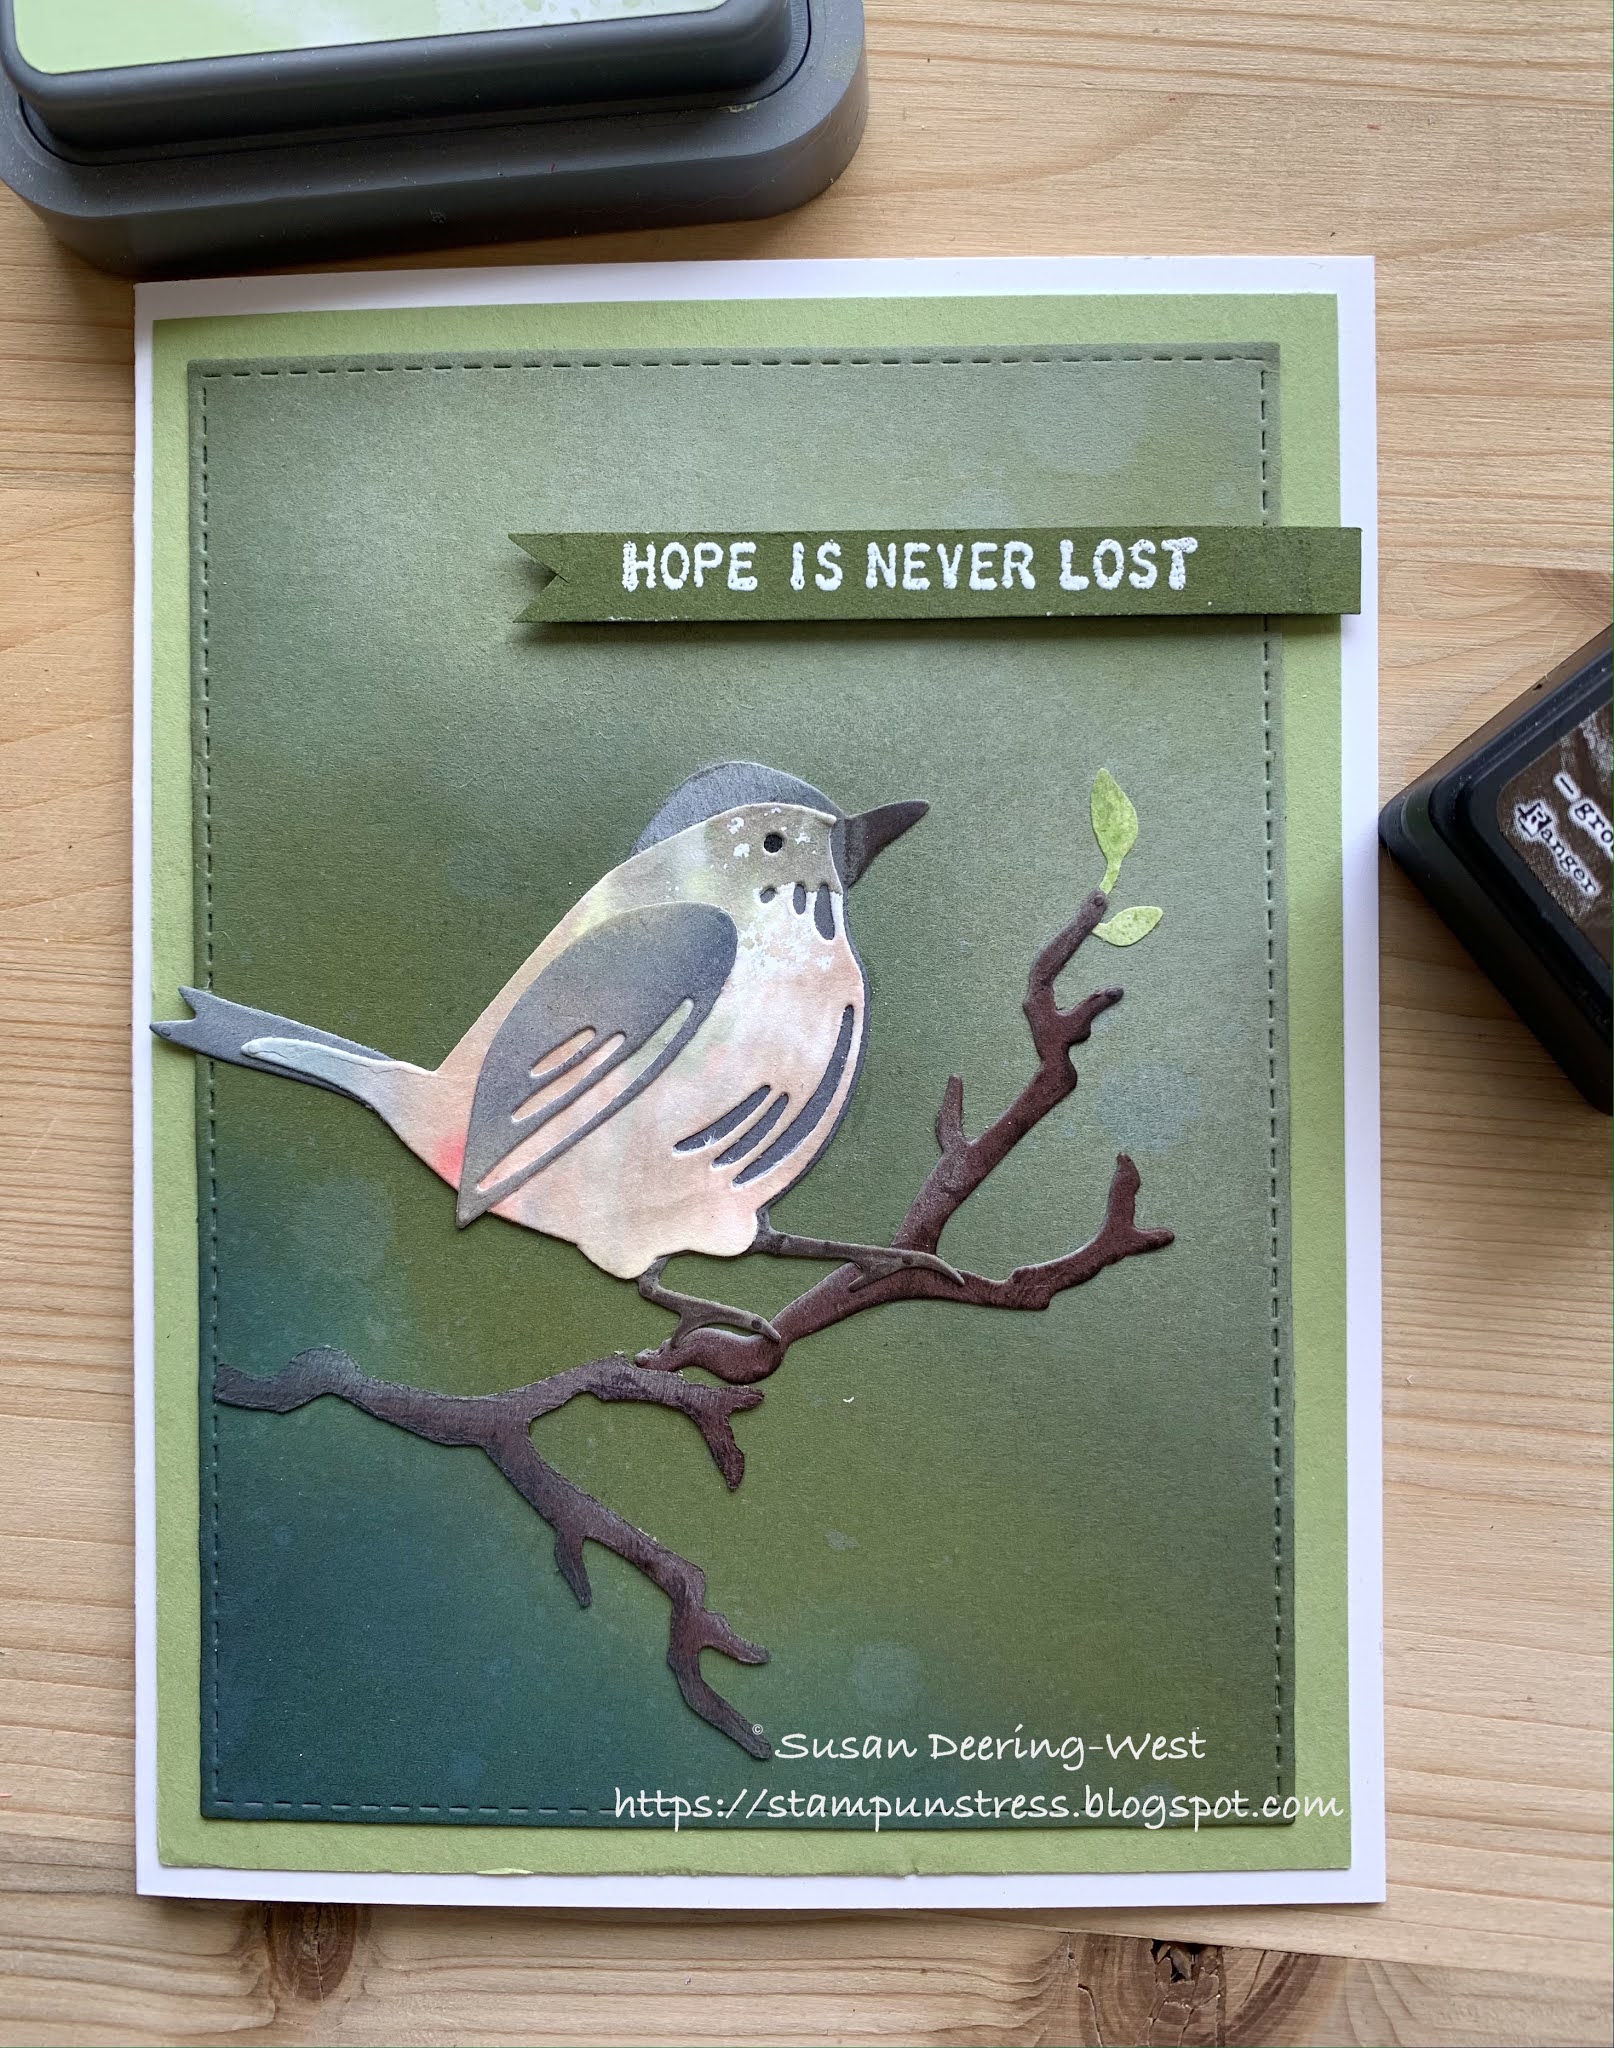
 I decided to try this Distress Ink blending on a dark paper. I've used a similar approach on scraps years ago, but not with Distress Oxides. The Oxides make this blending effortless! I loved the results.
I began with a piece of SU Always Artichoke paper. The banner with the sentiment is the original color.
I wanted more depth in the paper so I used Shabby Shutters Oxide in the top right and a combination of Forest Moss, Rustic Wilderness and Black Soot for the bottom left.
I used a touch of Frayed Burlap Oxide on the top of the branches to highlight slightly, then used Ground Espresso Ink on the bottom for shaded texture. 
The bird base was cut from SU Basic Gray card stock. I lightly highlighted the head with Pumice Stone Oxide and the feet with Ground Espresso Ink. The body and wing of the bird are cut from scraps of background papers made last summer. The tiny leaves are from scraps as well.
Dies:
Bird- Sizzix Thinlits Tim Hotz Collection Feathered Friends 664433
Branch- Sizzix Alterations TH collection Fall Foliage 660955
Leaf - Sizzix Thinlits Alteration TH #661206
Sentiment Stamp - Stampers Anonymous Tim Holtz Collection Tiny Text CMS394
Paper- SU Always Artichoke, Early Espresso, Pear Pizzaz, Basic Gray

Jun 29, 2020

Bee Positive

Hello. Welcome to Creative Juice.

Today's card is my attempt at making a Tim Holtz inspired card using ONLY the limited Holtz supplies I own. I can't share cards on the Tim Holtz Addicts FB page if I use other products. Well I guess I won't as I always find something else to use that just "makes" the card. I can't afford all the Tim Holtz stuff I want on a retirement budget. Heaven knows I have plenty of other supplies.

This is a really simple card. The Tiny Text stamp set was the inspiration for this and the bright tag from my background stash just seemed to go with it. The tag is Bristol Smooth paper tapped onto Distress Inks spritzed with water on a glass media mat. The tag was cut with Die-namics Tag Builder Blue Print 7 from MFT Stamps.
Using a Honeycomb stencil from Scrapbook.com, I sponged Mustard Seed and Fossilized Amber Distress Ink on Stampin' UP Barely Banana paper. I added a little depth with Spiced Marmalade.
The flower silhouette is a Sizzix Thinlit. All of the text is from Stampers Anonymous Tiny Text.

I kind of like it. Bee happy,
Susan

Jun 26, 2020

Focus on the good gnome

Hello, thanks for visiting.

Todays card is another mixed style card. Backgrounds and gnomes.The background was my first attempt using distress sprays and oxides. I was really happy with this piece. I sprayed Scattered Straw and Shabby Shutters on the mixed media paper. Then I sprayed a bit of Brushed Corduroy and Frayed Burlap on my glass media mat and spritzed lightly with water. I tapped my paper in the ink and dried it between looks. 
Always a surprise........
I cut the panel with a MFTstamps Stitched Rectangle Die and mounted it onto MFT Kraft card stock.

I used Sizzix Thinlits Tim Holtz Alterations Die to cut hello out of SU Soft Suede card stock 4 times.
I layered the words together to give the word more visual weight. I stamped the focus phrase from Stampers Anonymous Tiny Text then used a micro liner to turn the o into music notes.

The Gnome is from klmdigitaldesign.com and is colored and attached to the card with foam tape.
Don't forget that KLM is now carrying polymer stamps. For those who have been asking for them, a little birdie told me there will be a large release of them SOON.

Have a creative day,
Susan

Jun 24, 2020

Wishing to be at the Ocean

Hello, and welcome to my little paper craft  blog.

I have had so much fun with the Tim Holtz inspiration. I love his positive energy!

Here is a card made using some old and new. I have always loved playing with ink and paper. That shading you see on the blue layer is an old technique I like to use when there isn't enough depth for me. I started with a piece of PTI Enchanted Evening, then sponged it, here and there, with Distress inks, Wilted Violet and Broken China. I then sponged touches of Brilliance Dew Drops in a dark green and blue to give it a little highlight. I ran the layer through my die cutter with the Sizzix Tim Holtz Thinlits Alterations Die. 
The sea horse and sand dollar were cut from Distress Ink backgrounds with a Spellbinders die. The coral was cut from a scrap of alcohol inked background with #MFT Stamps Under the Sea Die-namics.

The water panel was a piece of watercolor paper smooshed in Distress Ink on a glass mat, then stenciled with Wilted Violet and Broken China through Tim Holtz Bubbles Layering stencil. 

I attached a piece of smooth silver glitter paper behind the bubbles die cut. The panel was then cut using a stitched rectangle die. The sentiment is from Oceans of Joy, Sunny Studios.

I guess if I can't enjoy the ocean in person, this will have to do.
Susan