Showing posts with label dies. Show all posts

Oct 28, 2022

Gnome gift Tags

Hello there. Welcome to my little blog.

Today I am sharing one way I use the pre-colored images from klmdigitaldesigns.com. The flexibility of sizing allows one to use the same image in multiple ways.

Once I receive my images, I make sure to save them to an external storage device. I find a thumb drive works best for me. Just back the images up onto something. For this project, I printed the images in sizes to fit my tag dies.

I use an Apple computer, so I drop my images into Pages and size them according to my needs. It helps to have an idea of what you are going to use the images on. That makes sizing a snap! In this case, I wanted to make a package of holiday gift tags using the smaller tag die. I estimated the approximate size of the gnome based on that die. Then, I dropped and sized one image. Last, I copied and pasted it three times. That gave me four images the exact same size. I used a Scan N Cut to cut them out, but usually, I just fussy-cut the gnomes.
 I used blue scraps from my pile of handmade backgrounds to die-cut my tags and gave them a little spritz of Distress Mica Stains. Then, I stenciled some white cardstock and die-cut a coin envelope to put the tags into. I'll add a small label and ribbon right before I give this package away. They are the perfect size to drop in your purse and hand them out to those you cross paths with. I like to do that with the dentist's office, and the teller at the bank. Just a bit of holiday cheer.

The second tag uses a  variation of the first. This is a bigger tag to go on a gift bag for a birthday.
Here is when the versatility of digital stamps comes into play. I can change the size of the image to match my project. I cut a piece of background with the perfect color combination for this tag.
    If you make your own backgrounds, you know it is darn near impossible to have a clean back. I just trace the finished tag onto card stock, cut it out and glue it to the back. This gives a nice clean area to write a message.
Materials:
Digital Stamp- klmdigitaldesigns.com
Sentiment Stamps - Happy Holidays, Stampendous
                               Just for You, Scrapbook.com
Dies- Sizzix/Tim Holtz Thinlits Collector #665926
          Sizzix/Tim Holtz Thinlits Framed Tags #666065
Stencil- Stampers Anonymous #THMM133
Distress Mica Stain
Gold Icing Paste

Apr 5, 2021

Old Scraps work!

This card uses a little scrap I just couldn't to throw away. It was made YEARS ago. Probably close to 18 years. That's BAD!

The scrap is on Night of Navy paper from SU and uses a SU stamp set Autumn Floral (long retired). I used some kind of pigment ink to stamp the leaves. Back then I think the only kind I had was the petal shaped inks from Color box.
This little piece resurfaced again last week, so I pulled it out and vowed not to put it away again. It would become a card or trash! 
Then I started playing with the gel press and my Distress Oxides. I peeled this background off the press and tossed it on the table to dry... right next to that little navy strip. It was meant to be. A trip through the cutting machine with a Stitched Rectangle STAX die from MFT , a piece of Night of Navy card stock and the card was nearly done.
The sentiment circle was cut with a Stitched Circle STAX die (MFT) and stamped with a stamp from Mega Mixed Messages- PTI.

Sequins from Studio Katia and a little navy organdy ribbon and it is done. Finally that pretty little piece has a home.


Mar 29, 2021

Tim Holtz Tag inspired

Ah, yes. The Tim Holtz influence is undeniable. I just love his positive attitude and the way he encourages one to create. We need more people in this world with his kind of attitude. Anyway, most everything on this card is directly related to his work.


I used Distress Oxides in Kitsch Flamingo, Worn Lipstick and Spun Sugar on a gel press and Layered a Stampers Anonymous stencil THMM103 here and there.
The tag was cut with MFT Stitched Traditional Tag STAX and the background with Stitched Rectangle STAX.
All the colors on the tag is the pick up from my glass mat when making another project with Distress Oxide Ink.
The Wildflower 2 Sizzix Thinlit was cut from pieces of 
pre-made background papers. That little sentiment is from a sticker tablet, also Tim Holtz.


Mar 16, 2021

I'm a Holtz Junkie


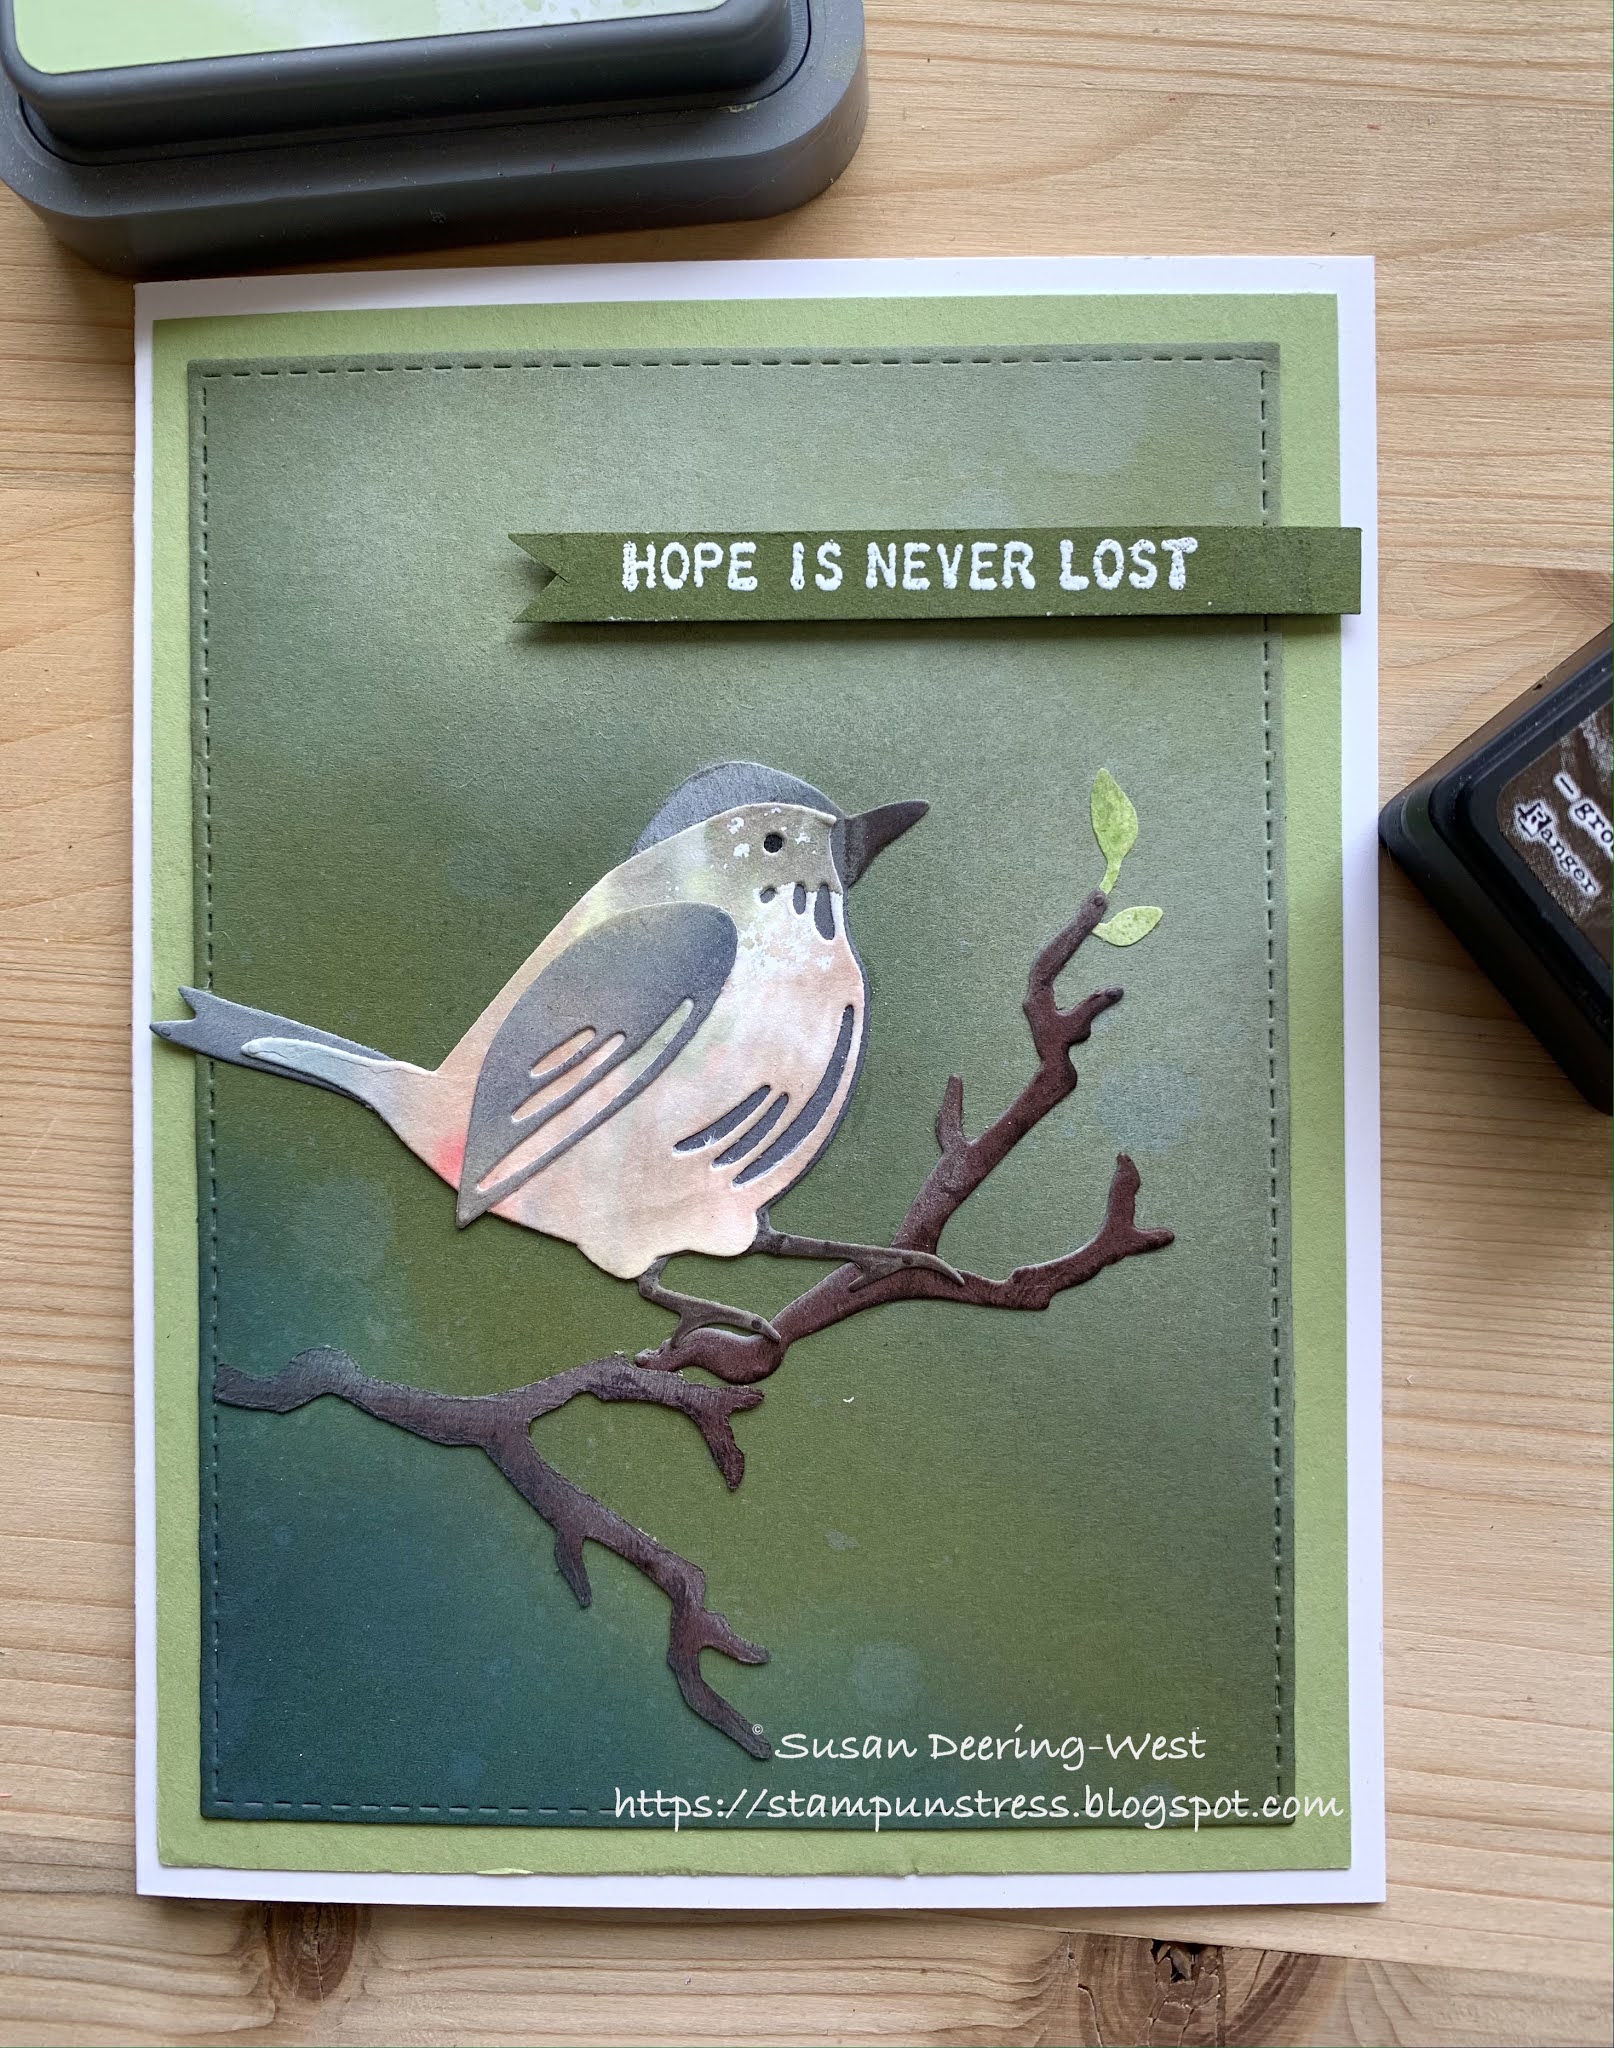
I started to watch Tim's new video on the basics of the Distress Inks this afternoon. I'll most likely watch it again because I barely got into the first 5 minutes of the blending section and a lightbulb went off. I love playing with the inks to make interesting background papers. I have a drawer full, but never enough!😏
 I decided to try this Distress Ink blending on a dark paper. I've used a similar approach on scraps years ago, but not with Distress Oxides. The Oxides make this blending effortless! I loved the results.
I began with a piece of SU Always Artichoke paper. The banner with the sentiment is the original color.
I wanted more depth in the paper so I used Shabby Shutters Oxide in the top right and a combination of Forest Moss, Rustic Wilderness and Black Soot for the bottom left.
I used a touch of Frayed Burlap Oxide on the top of the branches to highlight slightly, then used Ground Espresso Ink on the bottom for shaded texture. 
The bird base was cut from SU Basic Gray card stock. I lightly highlighted the head with Pumice Stone Oxide and the feet with Ground Espresso Ink. The body and wing of the bird are cut from scraps of background papers made last summer. The tiny leaves are from scraps as well.
Dies:
Bird- Sizzix Thinlits Tim Hotz Collection Feathered Friends 664433
Branch- Sizzix Alterations TH collection Fall Foliage 660955
Leaf - Sizzix Thinlits Alteration TH #661206
Sentiment Stamp - Stampers Anonymous Tim Holtz Collection Tiny Text CMS394
Paper- SU Always Artichoke, Early Espresso, Pear Pizzaz, Basic Gray

May 20, 2011

Daughter's Mother's Day

Now that Mother's Day is past I can share the card I made for my daughter. If I had posted it before the date it wouldn't have been a surprise! Besides, I promised to space out the cards I made with Button Boutique from Papertrey Ink. I really like this set. There are so many ways to use it and it gives me such a nice feeling  when I design with it. I have fond memories of button boxes at my mother's, both of my grandmothers, and my great grandmother, all of them accomplished seamstresses. Creativity runs in our veins, in this family. This is the perfect card for DD. She used to love to look at all the buttons in grandma's button box.
I really like the way this came out. Once finished I got a chuckle from it. I didn't realize it as I was designing this but, the ribbon and the pearls are from left over materials from her wedding in 2003. Here they are showing up 7 years later. The color is PTI Scarlet Jewel. I used the die from Button Card Collection to cut the piece of fabric. It is much easier to get a clean edge on the fabric if you cut a piece of cardstock at the same time.

Hope you liked your card, Kate.                                              

Feb 14, 2011

Through the Trees

Trees Sympathy

This is a very simple card to make.

Cut center oval with a Nestabilities Oval and emboss it.

Cut the next sized oval in white for the inside image.

Use Eclipse paper or a Post It to mask the moon area. Use 3 colors of blue and sponge around the moon. Begin with the lightest; blend out to the darkest. Stamp image over the sponged sky.

Line up the stamped oval with the front cut out. Attach the oval to the back panel.

Stamp the branch and sentiment on the front. Tie ribbon through the oval  around the front. 

Cardstock: Fine Linen, Stampers Select White

Stamp: Through the Trees, Out on a Limb

Ink: (Tuxedo Black) Tsukineko, (Enchanted Evening, Chamomile) PTI, (Bashful Blue, Night of Navy) SU

Feb 12, 2011

Think Big Challenge

DSC_0913


    Have a big bouquet? This is my answer to this challenge.

  Make a project that incorporates something mega-sized!

This is the challenge at PTI.

All materials are from PTI except the crystals. Those I found in the $1 bin at Michael’s. They are a perfect match to the PTI papers.

The card itself is oversized and will fit in a legal sized envelope.

Check out the links to the other BIG projects. There are some really talented people.


Thank you PTI.

Enjoy

"Love"-ly Lace


Oh, happy day. Mid-winter vacation is here. Before I begin cleaning house in earnest I needed to take care of some blog business.


Thanks to my daughter for her "plug". The secret to finding the time... I ignore the dog hair and dust until vacation, LOL . Now I have to REALLY clean. Maybe I'll save one day to craft.


Here is a card I made for the last call. The problem is I read the dates wrong and missed the submission deadline. The good news is I will have a few for blog posts! A silver lining.

Oh, by the way, Happy Valentine's Day.

Papers, Mat stack die, and sentiment are from PTI; image stamp is SU; scallop punches are Martha Stewart; embossing is Cuttlebug folder; bridal trim and pearls.