 Good morning everyone. It's time for me to step out of my comfort zone and do something NEW! Katy, over at KLM digital designs, and I have received many questions on how the beards of the gnomes are colored. The images are not overly detailed deliberately. This was to allow for individuals to detail them as they see fit. Shading is a personal preference as is adding other details like stripes, snowflakes, or dots.
In this image the snowflakes on the hat are part of the image, but overdrawn with a glitter gel pen. The package is blank allowing for personalization so I chose to mimic the snowflakes.
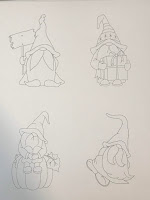
On to the beard... begin with a page of images to practice on. I usually print 4 to a page. To begin I would scale them around 3.73 to 4.0 inches as the smaller you go the less detail you will want.
For this tutorial I will use Copic markers in the T range of gray.
T0, T2,T3, T4 and a Copic multiliner 0.1
Note: all gray is not the same. Depending on the colors of Gnomes clothing or the card design you may want different colors. The basic process is the same, though.
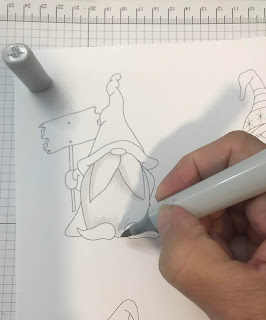
My first step is to block in the shadow areas with my lightest color. I'm right handed so I nearly always shade my images with the light coming from that direction. I use the flick stroke on the beards. HERE is a great tutorial on this technique.
Next, I flick in the darkest shadows. I begin where the darkest shadow will be and flick towards the lightest area with my T3. I flick top down and bottom up on the beard and mustache so there will be a natural highlight around the middle area. Be light, you can always lengthen and add more. It's harder to take it away. Always move in the direction the hair will fall. His mustache is rather groomed so the lines should follow the shape of the mustache. Note: Here I am using a bullet point marker as I don't own a Sketch in this color. The lines are a little more defined than I usually like but the following steps will solve that issue.
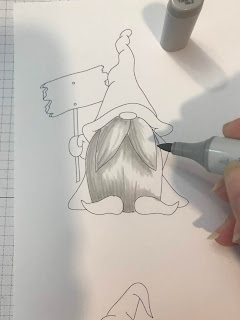
I go over the shadows, with a T2, softening the harder strokes and pulling the lighter color a little further into the uncolored area. Flick, flick is the trick!
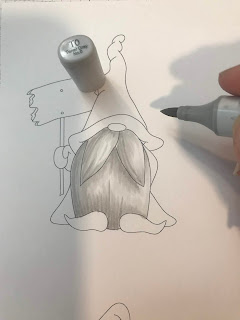
Now I go back over the shaded areas LIGHTLY, just to blend in any harsh transitions between colors. There are still some areas that remain uncolored. This helps create a bit of a highlight.
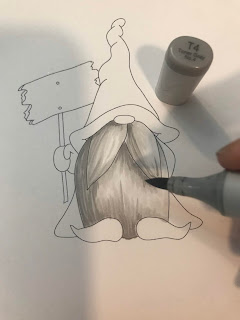
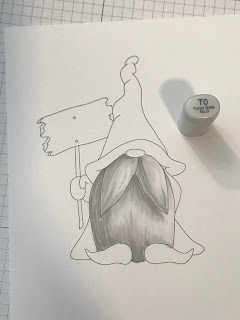
I am a contrast person. I like a lot of it. The shadows were not deep enough for me so I added a bit of T4 in the darkest areas with short flicks. I often find myself adding a darker tone to all my shadows to create more dimension.
I go back again with T0 to flick out any hard transitions. You can see the difference between the last photo and this one. Still keep some of that white area for highlight.
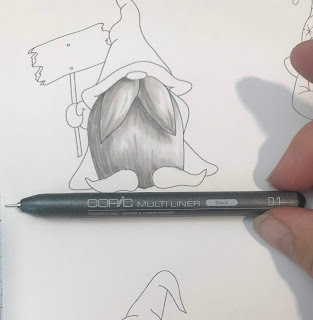
This is the magic tool. There are several makes of fine liners you can use. I use this very fine one because I like to add the detail in layers.
Begin in the area of the dark shadow. Flick lightly with this pen as well. Remember, you can always add more its harder to lighten. It is important to work both top down and bottom up with this pen. It makes for a more natural look.
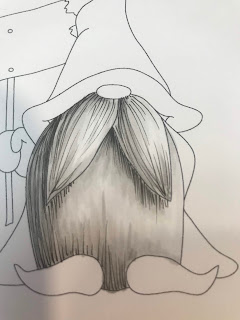
Continue to add fine flicked lines in the shadow areas. Lines placed close together will give a darker shadow. As you want to lighten the shadow and add texture to the lightest areas, space lines farther apart and use a lighter touch.
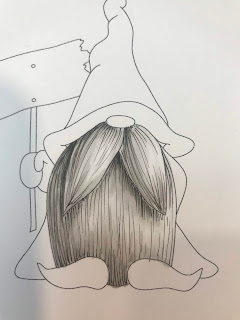
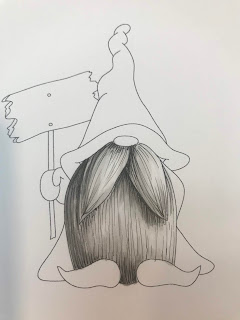
Here you can see the variations in the lines. I did go back to add lines to the left side of both sections of his mustache to make it look a little more prominent.
I still wanted more contrast so I added just a touch more of T4 where the deepest shadows would fall.
I hope this will help. Shading is a learning process. It is really a matter of observation and practice. You don't need to color with Copics, just practice with the tools you have.
Sandy Allnock has amazing tutorials in many mediums. She makes shading and how to do it so easy to follow. I strongly suggest checking her out.
Until the next time... practice, practice.
Susan


3 comments:
Great tutorial. Thank you for taking the time to show us how you accomplish this.
thank you for taking the time to show us this technique.
Wonderful tutorial. I think I’ll need a lot of practice!!
Post a Comment